
Why Is My Induction Coil Overheating? Causes, Checks, and Fixes
An induction coil carries high current during operation, so some heat is normal. What deserves attention is a change from normal production: the coil starts running noticeably hotter, one area repeatedly discolors, a concentrator deteriorates, or the same section of copper fails again and again.
Cooling problems are common, but they are not the only cause.
A useful first step is to look at where the heat appears and when the problem started.
Safety: Never inspect or touch an energized induction coil. Shut down the equipment and follow the machine manufacturer’s electrical and cooling-system procedures before checking the coil, hoses, connections or cooling passages.
Table of Contents
1. First: What Is Actually Overheating?
Three different problems are often described simply as “overheating”:
• the induction coil itself is running too hot
• the workpiece is overheating
• the coil is arcing, burning or shorting
They should not be diagnosed in the same way.
If the workpiece temperature is too high while the coil remains normal, the heating recipe, power, coupling or process settings may be the real issue.
Visible burn marks or electrical tracking point more toward insulation, clearance, contamination or electrical damage.
For the coil itself, start with one question:
Is the whole coil getting hotter, or is the problem concentrated in one location?
| What You Observe | Check First |
|---|---|
| The whole coil gradually runs hotter | Water flow, coolant temperature, blockage |
| One area repeatedly overheats | Local cooling, connection, coil geometry |
| The problem appears after months of operation | Scale, deposits, filters |
| A new coil runs hot immediately | Installation, water path, matching, geometry |
| Heating changes after the coil is moved | Coil position and workpiece clearance |
| Burn marks or arcing appear | Insulation, contamination and clearance |
| Several coils fail in the same place | Local thermal, electrical or mechanical cause |
This table is only a starting point, but it usually gives a better direction than simply lowering the power.
2. Check the Cooling Circuit First
If an established coil has operated normally and gradually begins running hotter, cooling is usually the first thing to investigate.
Common problems include:
| • scale or mineral deposits | • debris inside the copper passage |
| • clogged filters | • kinked or deteriorated hoses |
| • restricted fittings | • incorrect valve positions |
| • high coolant temperature | • reduced pump or chiller performance |
One common mistake is assuming that normal water pressure means normal cooling.
It does not.
A partially blocked circuit may still show pressure while actual flow through the coil is too low. Where a required flow value is available, measuring flow is more useful than looking at pressure alone.
Deposits also create two problems at once. They reduce the available water passage and form a thermal barrier between the copper and cooling water.
That is why a coil may slowly begin running hotter even though the electrical recipe has not changed.
Do not forget the production cycle
Cooling may look acceptable during one or two heating cycles but become insufficient during continuous production.
If the duty cycle increases, the coil has less time to lose accumulated heat between parts.
So if the problem only appears after repeated production, do not troubleshoot it using a single isolated cycle.
3. If Only One Area Is Hot, Look for a Local Problem
A repeated hotspot usually needs a different investigation from general coil heating.
Local heat can come from:
| • restricted cooling in one part of the coil | • high current density |
| • narrow copper sections | • sharp transitions or difficult coil geometry |
| • damaged connections | • flux concentrator problems |
The location matters.
If the hottest area is near a mounting point or electrical connection, inspect mechanical tightness, contact surfaces, oxidation and brazed or welded joints.
If the same working section repeatedly discolors or cracks, then simply replacing the coil may only reproduce the problem.
At that point, both the cooling passage and the local electromagnetic loading should be reviewed.
Flux concentrator damage is not always coil overheating
On many induction hardening coils, magnetic flux concentrators are installed close to the active heating area.
If the concentrator darkens, cracks or separates while the copper remains relatively normal, treat it as a separate problem.
Possible factors include:
| • concentrator material | • installation | • local cooling |
| • operating frequency | • contamination | • local magnetic loading |
Increasing water flow through the copper will not necessarily solve a concentrator problem.
4. Check Coil Position and What Changed
Mechanical changes can affect an induction process even when nobody has changed the heating recipe.
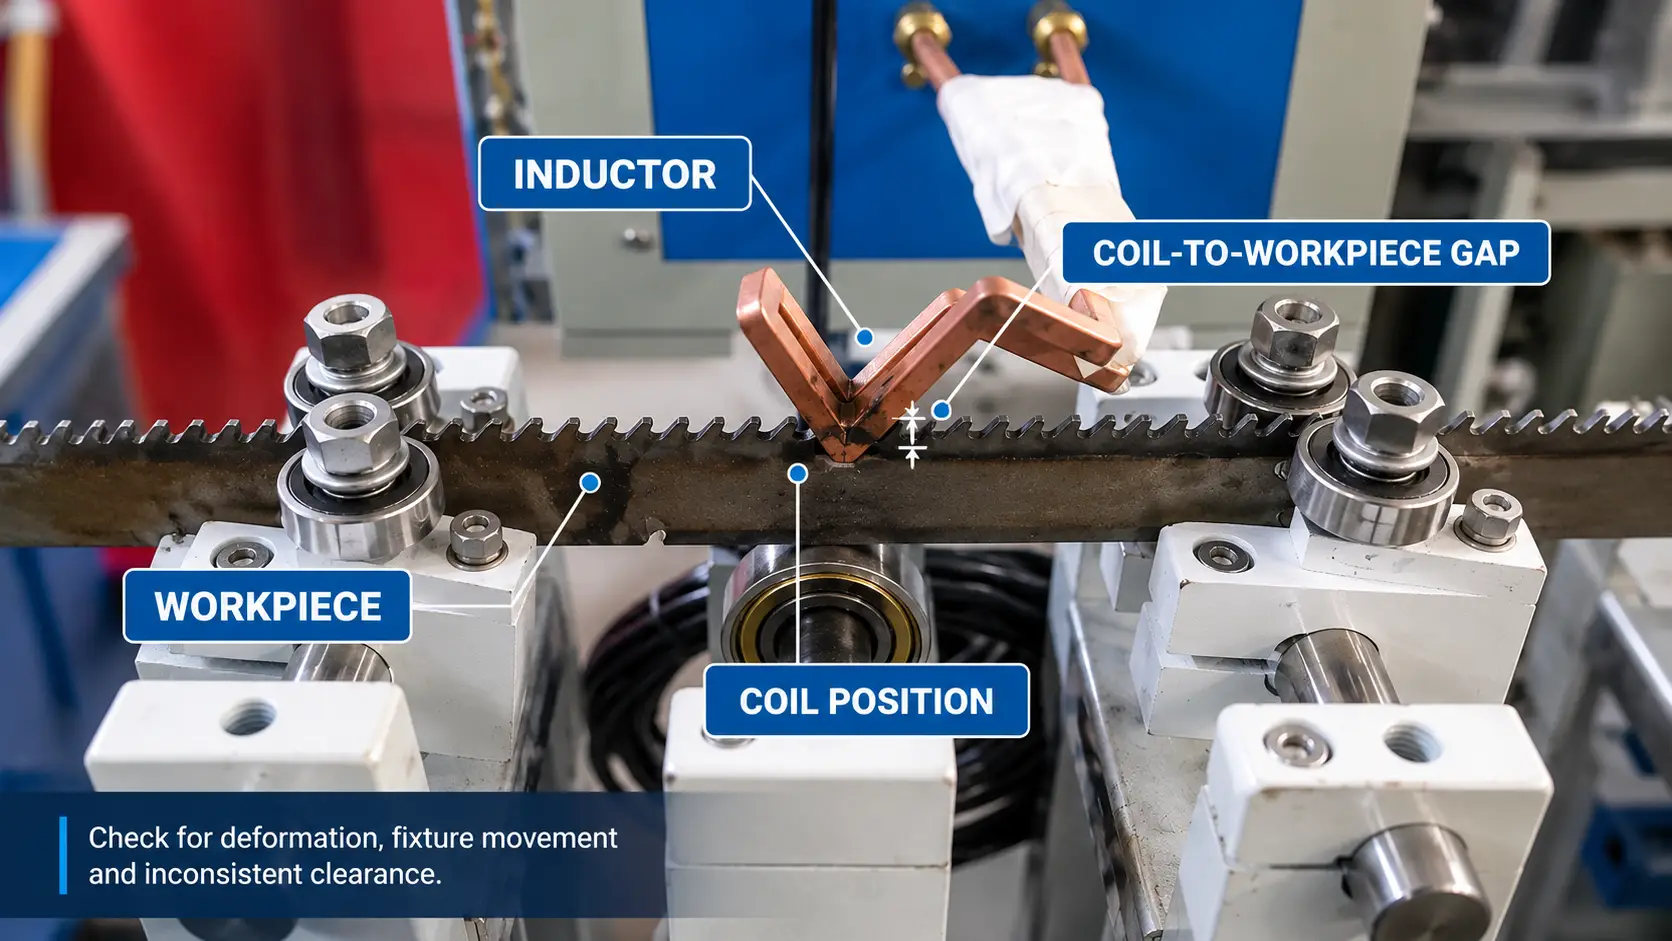
A coil can be bent during handling. A fixture can move. A rotating part can develop runout. A replacement coil may sit slightly differently from the previous one.
Check:
| • coil deformation | • fixture movement |
| • part positioning | • coil-to-workpiece clearance |
| • workpiece runout | • repeatability from part to part |
For rotating parts, check the clearance around the complete circumference rather than at one position only.
If the overheating started immediately after installing a new or repaired coil, the troubleshooting priority also changes.
Review:
| • cooling-water connections | • flow direction | • copper dimensions |
| • cooling-passage geometry | • coil position | • number of turns |
| • electrical matching | • operating frequency | • fabrication quality |
For an old coil that suddenly starts running hotter, cooling and deterioration usually come first. For a new coil that behaves differently from the beginning, geometry and electrical matching deserve attention much earlier.
5. For Hardening Coils, Check the Working Environment
Induction hardening coils often operate very close to high-temperature workpieces.
Radiation and convection from the part can add heat to the inductor, although the importance of this effect varies with the application.
Relevant factors include:
| • workpiece temperature | • heating time | • coil-to-workpiece gap |
| • duty cycle | • available cooling |
Do not automatically assume that the hot workpiece is the main cause. The position of the hotspot and the cooling condition still need to be checked.
Quench spray adds another variable.
On induction hardening equipment, inspect whether quench liquid is reaching:
| • electrical connections | • insulation |
| • flux concentrators | • joints |
| • areas not intended for continuous spray exposure |
A changed spray pattern or damaged shield may create a new operating condition even when the heating program remains the same.
6. When Repeated Failure Means More Than Maintenance
A single damaged coil does not automatically mean the design is wrong.
Copper can be damaged by thermal cycling, vibration, impact, overheating or fabrication problems.
Repeated failure is more informative.
Pay attention when several coils:
| • develop the same hotspot | • crack in the same position |
| • repeatedly damage the same concentrator area | • deform during normal production |
| • continue overheating after the cooling system has been checked |
In this situation, replacing the coil with another identical copy may only restore production temporarily.
The application may need to be reviewed as a complete system:
Workpiece + Coil Geometry + Cooling + Power + Frequency + Positioning + Production Cycle
The goal is not simply to make the next coil last longer. It is to find out why the same failure keeps returning.
7. Quick Troubleshooting Order
When an induction coil starts running hotter than normal:
1. Identify what is actually overheating. Copper coil, workpiece, connection and concentrator are different problems.
2. Check cooling performance. Look at flow, coolant temperature, filters, hoses and possible deposits.
3. Look at the location of the heat. General heating and one repeated hotspot usually point in different directions.
4. Ask what changed. New coil, moved fixture, different part, higher production rate or cooling-system changes can provide important clues.
5. If the same problem keeps returning, review the coil design rather than only replacing the coil.
8. Final Check
Cooling is usually the first place to look when an established induction coil begins running hotter than normal.
But a clear water passage does not prove that the coil is correctly positioned, electrically matched or properly loaded.
A coil that slowly becomes hotter after months of production, a new coil that overheats immediately and a coil that repeatedly develops one local hotspot are three different troubleshooting situations.
Start with the symptom and the history of the problem.
That usually leads to the cause faster than lowering the power and trying again.
Frequently Asked Questions
Click a question to expand the answer.
Is some heat from an induction coil normal?
Yes. The coil carries high current during operation, so some heat is expected. What matters is a change from normal: hotter running, repeated discoloration, or the same section failing again.
Does normal water pressure mean the coil is cooling properly?
No. A partially blocked circuit can still show pressure while flow through the coil is too low. Where possible, measure flow rather than relying on pressure alone.
Why does only one area of the coil overheat?
A repeated hotspot usually points to a local cause: restricted cooling in one part, high current density, a narrow section, a damaged connection, or a flux concentrator problem.
Is a hot workpiece the same as a hot coil?
No. Workpiece overheating is a process, power, coupling or settings issue; coil overheating is a coil and cooling issue. They are diagnosed differently.
Why does the same coil keep failing in the same place?
Repeated failure suggests reviewing the complete system — workpiece, coil geometry, cooling, power, frequency, positioning and production cycle — rather than only replacing the coil.
Still Unable to Pin Down the Overheating?
Send us the symptom, photos of the coil and concentrator, and your cooling and process settings — our engineers will help you locate the cause.


